> ## Documentation Index
> Fetch the complete documentation index at: https://docs.hostrox.net/llms.txt
> Use this file to discover all available pages before exploring further.
# Website Protection
> How to set up traffic protection and filtering: sensors, lists, and advanced rules in the Firewall Panel (firewall.hostrox.net).
The Firewall Panel is available at [firewall.hostrox.net](https://firewall.hostrox.net). Use it to configure traffic protection and filtering for your protected resources — sensors, lists, geo and header rules, and advanced thresholds.
## Getting started
Once the product is activated, it appears on your account's main page and in the **My products** section. Click the product name to open the settings panel.
1. In the settings, find the object you want to configure and click its row (the one that displays a small graph thumbnail).
2. In the left-hand menu, select **Protection**.
3. Configure the parameters described below.
## Protection mode
Choose the active protection method applied to incoming traffic.
Monitors the total number of requests, spikes, and errors while the filters remain in passive mode. If an attack is detected, the sensor activates the filters to mitigate it. Response time is usually under one minute but may vary with attack intensity.
Visitor requests receive an additional redirect to the requested location.
Requests from regular IP addresses are validated using JavaScript.
Requests from regular IP addresses are validated using advanced JavaScript checks.
Each request to the site must pass a Captcha challenge before being allowed through.
## Proactive protection
Protection based on a positive security model. Users whose behavior does not match the model can be blocked or subjected to additional checks, depending on the configured settings.
When proactive protection is enabled in **sensor mode**, requests are not filtered, but each new visitor is evaluated against multiple parameters:
* Pages visited on the site
* Use of keep-alive connections
* Presence of attacks on other sites
* Whether request limits are exceeded
* User Agents used
* Other indicators
If violations are detected, the user's behavior continues to be monitored. Selective validation makes it possible to avoid switching the entire configuration into active mode.
## Cookie
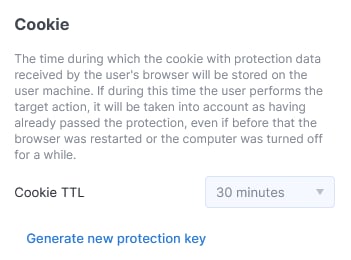
Limit the duration of user sessions to reduce the window of opportunity for unauthorized actions. When the configured time expires, users must re-authenticate. The default value is **30 minutes**.
Clicking **Generate new protection key** forces all active users to revalidate their sessions.
The lifetime of cookies used by the security system does not affect your website's session durations. The system does not modify the website's original cookies.
 ## Whitelist, Blacklist, Greylist
Manage IP, subnet, and ASN-based access lists from the same panel. Switch between tabs to configure each list.
## Whitelist, Blacklist, Greylist
Manage IP, subnet, and ASN-based access lists from the same panel. Switch between tabs to configure each list.
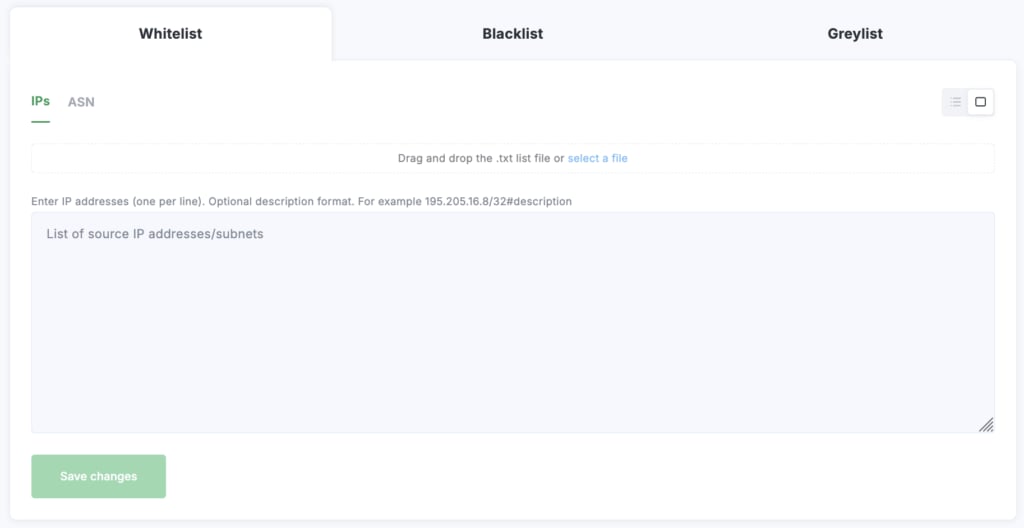 Requests from addresses on this list are transmitted without filtering.
* Fill out the form to add a new address, or upload a `.txt` file with one address per line.
* Add individual addresses (e.g. `8.8.8.8`) or networks with a mask (e.g. `8.8.8.0/24`).
* Use the **ASN** tab to add AS numbers the same way.
Users with an address from this list receive an **HTTP 403 Forbidden** error when accessing your resource. Add entries in the same way as the Whitelist.
Assign a unique protection method — different from the global one — to specific IPs or subnets. Add entries the same way as the Whitelist.
## Geolocation Filter
Restrict access to your resource based on the visitor's country of origin.
Requests from addresses on this list are transmitted without filtering.
* Fill out the form to add a new address, or upload a `.txt` file with one address per line.
* Add individual addresses (e.g. `8.8.8.8`) or networks with a mask (e.g. `8.8.8.0/24`).
* Use the **ASN** tab to add AS numbers the same way.
Users with an address from this list receive an **HTTP 403 Forbidden** error when accessing your resource. Add entries in the same way as the Whitelist.
Assign a unique protection method — different from the global one — to specific IPs or subnets. Add entries the same way as the Whitelist.
## Geolocation Filter
Restrict access to your resource based on the visitor's country of origin.
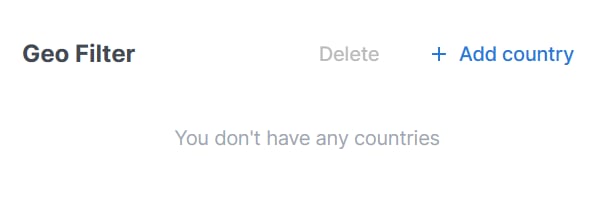 1. Click **Add country** and fill out the form. Countries are available from a dropdown list.
2. Assign a specific protection level to each selected country.
When using L3 and L7 filtering **without** SSL decryption, you can add no more than **15 countries per rule**. For L7 filtering **with** SSL decryption, there is no country limit.
1. Click **Add country** and fill out the form. Countries are available from a dropdown list.
2. Assign a specific protection level to each selected country.
When using L3 and L7 filtering **without** SSL decryption, you can add no more than **15 countries per rule**. For L7 filtering **with** SSL decryption, there is no country limit.
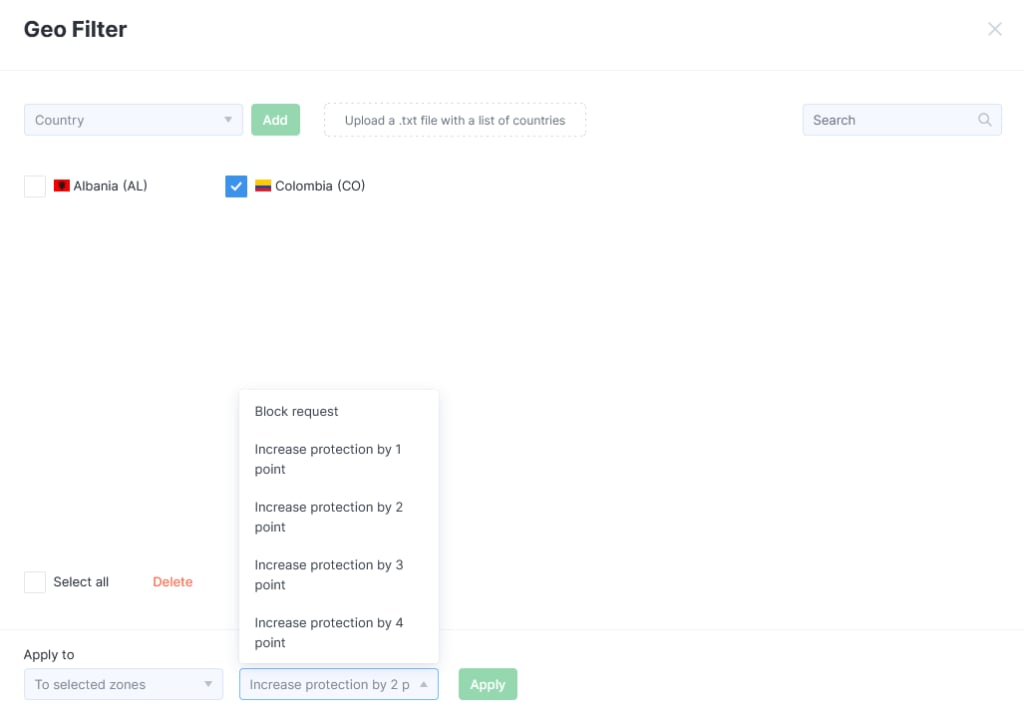 The protection level escalates incrementally from the current state:
`SENSOR` → `REDIRECT` → `JS` → `JSA` → `CAPTCHA`
**Example.** If the current protection method is `REDIRECT`:
* *Increase protection by 1 point* switches to `JS`
* *Increase protection by 2 point* activates `JSA`
## Exceptions by location
Disable interactive checks for specific request paths — useful when only bots or mobile apps access a particular server resource and a check would break the client.
A request is sent to the whitelist if its path contains a segment specified in this setting.
The protection level escalates incrementally from the current state:
`SENSOR` → `REDIRECT` → `JS` → `JSA` → `CAPTCHA`
**Example.** If the current protection method is `REDIRECT`:
* *Increase protection by 1 point* switches to `JS`
* *Increase protection by 2 point* activates `JSA`
## Exceptions by location
Disable interactive checks for specific request paths — useful when only bots or mobile apps access a particular server resource and a check would break the client.
A request is sent to the whitelist if its path contains a segment specified in this setting.
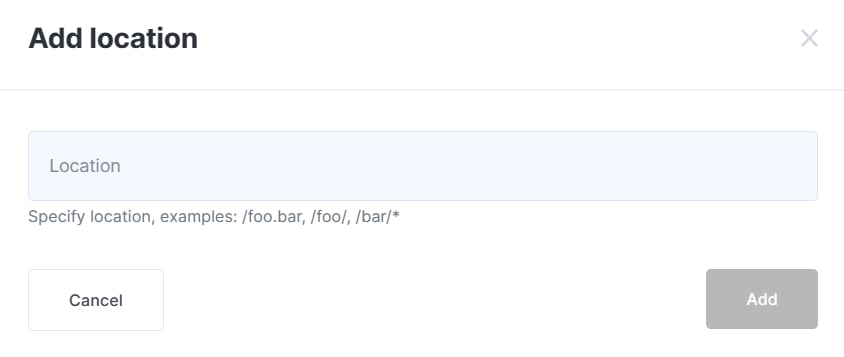 For example, adding `/location` to the whitelist will skip checks for:
* `site.com/location`
* `site.com/location/`
* `site.com/location.php`
* `site.com/location.php?id=123`
* `site.com/admin/location`
But these requests are still processed by the general rules:
* `site.com/some-other-location`
* `site.com/en_location.php`
Click **Add location** and fill out the form that appears.
## Header Filter
Create rules to **block** or **allow** requests containing a specific header. Especially useful when working with APIs, where requests are made by a separate application. You can specify a single header or a combination of several.
For example, adding `/location` to the whitelist will skip checks for:
* `site.com/location`
* `site.com/location/`
* `site.com/location.php`
* `site.com/location.php?id=123`
* `site.com/admin/location`
But these requests are still processed by the general rules:
* `site.com/some-other-location`
* `site.com/en_location.php`
Click **Add location** and fill out the form that appears.
## Header Filter
Create rules to **block** or **allow** requests containing a specific header. Especially useful when working with APIs, where requests are made by a separate application. You can specify a single header or a combination of several.
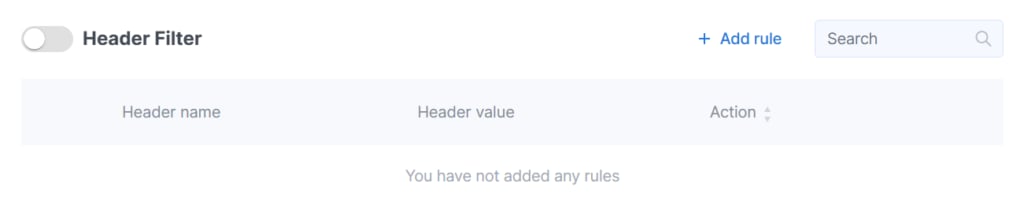 Click **Add rule** and fill out the form:
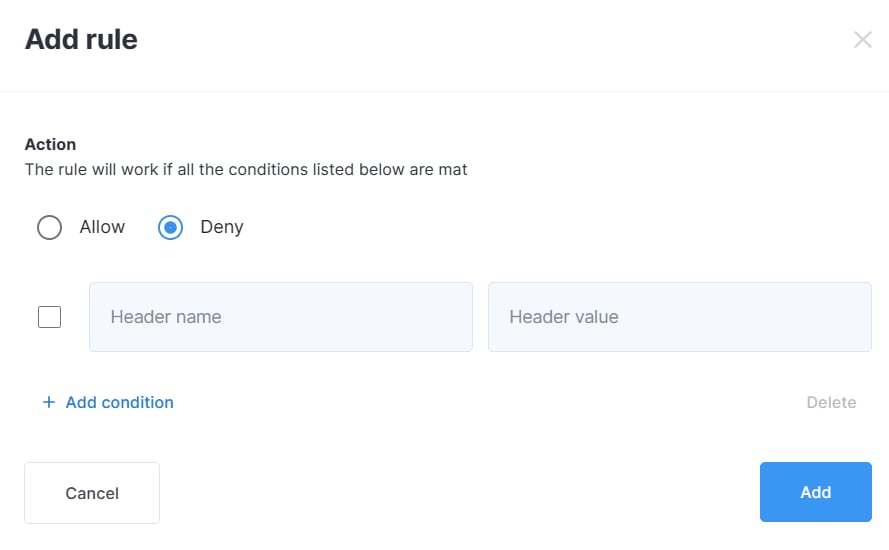 * Choose **Allow** or **Deny** as the action.
* Provide a **Header name** and **Header value**.
* Use **Add condition** to combine multiple headers in a single rule.
## Location filter
Configure filtering for different locations of your resource. A default rule template is provided — edit it from the row actions, or create a new rule from scratch with **Add rule**.
* Choose **Allow** or **Deny** as the action.
* Provide a **Header name** and **Header value**.
* Use **Add condition** to combine multiple headers in a single rule.
## Location filter
Configure filtering for different locations of your resource. A default rule template is provided — edit it from the row actions, or create a new rule from scratch with **Add rule**.
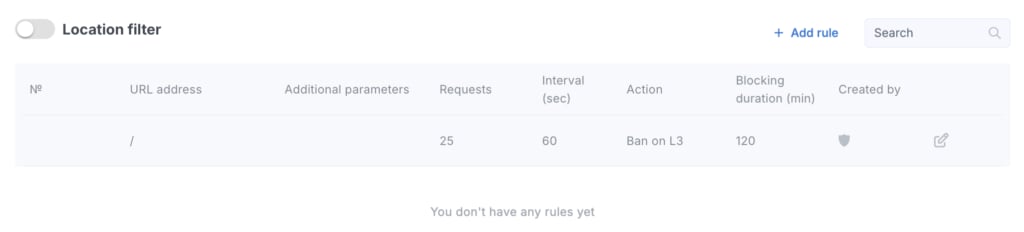
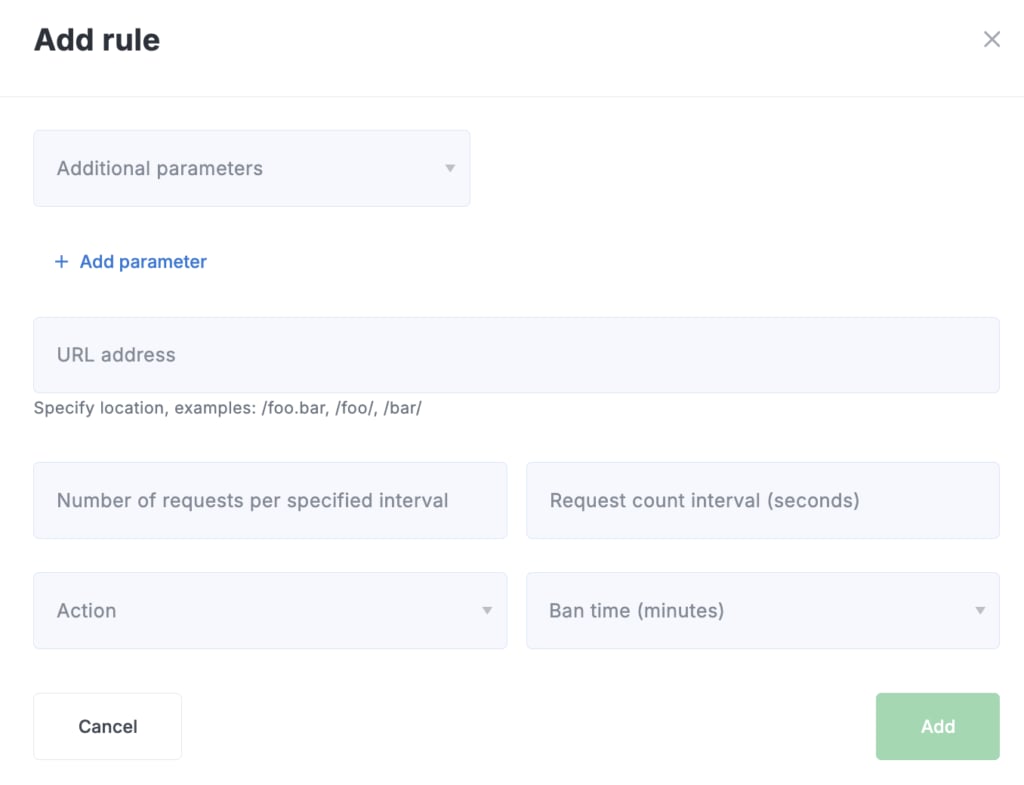 Key fields:
* **URL address** — location to match (examples: `/foo.bar`, `/foo/`, `/bar/`).
* **Number of requests per specified interval** and **Request count interval (seconds)** — define the rate-limit window.
* **Action** — what to do when the threshold is exceeded.
* **Ban time (minutes)** — duration of the block.
### Additional parameters
* **Count subject** — specify a unique user identifier (`uid`) to refine the rule. The `uid` is calculated from request parameters, IP, and JA3. If not selected, the calculation uses the IP address.
* **Additional** — create a stop rule by setting `stop=1`. If a request matches a rule with `stop=1`, subsequent rules are not evaluated for that request. You can have multiple `STOP` rules.
## Advanced settings
Experienced users can configure sensor parameters, application-level (L7) bot detection, and network-level (firewall) thresholds.
Key fields:
* **URL address** — location to match (examples: `/foo.bar`, `/foo/`, `/bar/`).
* **Number of requests per specified interval** and **Request count interval (seconds)** — define the rate-limit window.
* **Action** — what to do when the threshold is exceeded.
* **Ban time (minutes)** — duration of the block.
### Additional parameters
* **Count subject** — specify a unique user identifier (`uid`) to refine the rule. The `uid` is calculated from request parameters, IP, and JA3. If not selected, the calculation uses the IP address.
* **Additional** — create a stop rule by setting `stop=1`. If a request matches a rule with `stop=1`, subsequent rules are not evaluated for that request. You can have multiple `STOP` rules.
## Advanced settings
Experienced users can configure sensor parameters, application-level (L7) bot detection, and network-level (firewall) thresholds.
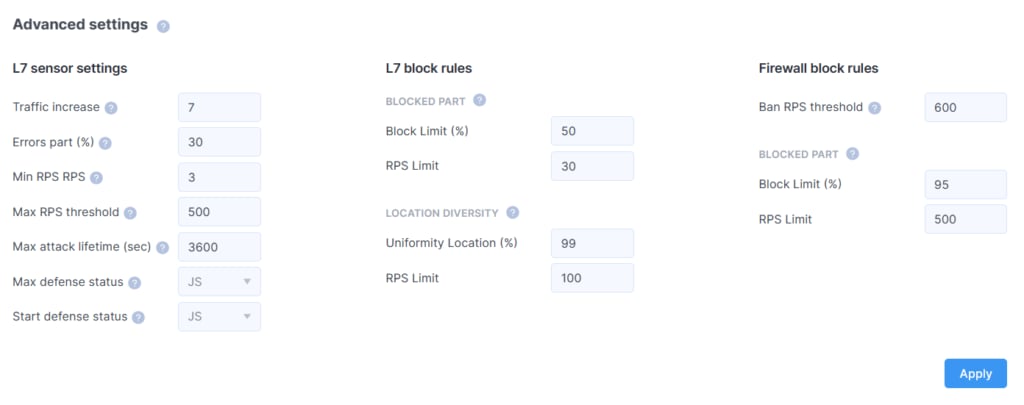 ### L7 sensor settings
Parameters that control attack detection.
| Field | Description |
| ----------------------------- | --------------------------------------------------------------------------------------------------------------------------------------------------------------------------- |
| **Traffic increase** | Factor by which the number of requests must rise over a short period to activate protection. Example: `3` activates protection if requests triple over the last 15 minutes. |
| **Errors part (%)** | Percentage of erroneous requests (HTTP 500-series) that switches filters to active mode. Example: `30` activates protection if errors exceed 30%. |
| **Min RPS** | Value below which **Traffic increase** and **Errors part** checks are not performed. |
| **Max RPS threshold** | Number of requests that, when exceeded, triggers the switch to active mode. |
| **Max attack lifetime (sec)** | Time after the start of an attack after which the filter attempts to return to sensor mode. Useful against sporadic attacks. |
| **Max defense status** | Maximum protection level applied during automatic triggers. |
| **Start defense status** | Protection level applied when the filter first switches from sensor mode to active mode. |
### L7 block rules
Values used to detect bot activity at the application level.
If more requests arrive from an IP than the **RPS Limit**, and the percentage of blocked requests exceeds the **Block Limit**, the system identifies the address as malicious and blocks it at L7. The user from that IP sees an error page instead of the site.
* **Blocked part**
* **Block Limit (%)**
* **RPS Limit**
* **Location diversity**
* **Uniformity Location (%)**
* **RPS Limit**
### Firewall block rules
Network-level thresholds that block traffic from nodes, subnets, and networks **without** activating application-level filtering.
* **Ban RPS threshold** — if exceeded, the IP is blocked without additional checks.
* **Blocked part L3 (%)** — if **RPS Limit** is exceeded and the proportion of blocked requests from that IP surpasses **Block Limit**, the address is blocked.
* **Block Limit (%)**
* **RPS Limit**
Click **Apply** to save your advanced settings.
### L7 sensor settings
Parameters that control attack detection.
| Field | Description |
| ----------------------------- | --------------------------------------------------------------------------------------------------------------------------------------------------------------------------- |
| **Traffic increase** | Factor by which the number of requests must rise over a short period to activate protection. Example: `3` activates protection if requests triple over the last 15 minutes. |
| **Errors part (%)** | Percentage of erroneous requests (HTTP 500-series) that switches filters to active mode. Example: `30` activates protection if errors exceed 30%. |
| **Min RPS** | Value below which **Traffic increase** and **Errors part** checks are not performed. |
| **Max RPS threshold** | Number of requests that, when exceeded, triggers the switch to active mode. |
| **Max attack lifetime (sec)** | Time after the start of an attack after which the filter attempts to return to sensor mode. Useful against sporadic attacks. |
| **Max defense status** | Maximum protection level applied during automatic triggers. |
| **Start defense status** | Protection level applied when the filter first switches from sensor mode to active mode. |
### L7 block rules
Values used to detect bot activity at the application level.
If more requests arrive from an IP than the **RPS Limit**, and the percentage of blocked requests exceeds the **Block Limit**, the system identifies the address as malicious and blocks it at L7. The user from that IP sees an error page instead of the site.
* **Blocked part**
* **Block Limit (%)**
* **RPS Limit**
* **Location diversity**
* **Uniformity Location (%)**
* **RPS Limit**
### Firewall block rules
Network-level thresholds that block traffic from nodes, subnets, and networks **without** activating application-level filtering.
* **Ban RPS threshold** — if exceeded, the IP is blocked without additional checks.
* **Blocked part L3 (%)** — if **RPS Limit** is exceeded and the proportion of blocked requests from that IP surpasses **Block Limit**, the address is blocked.
* **Block Limit (%)**
* **RPS Limit**
Click **Apply** to save your advanced settings.